遊戲製作/教學| 擦鏡子
Mirror Cleaning/ 20180124-27/ 免洗No.1

網址連結Link 網址連結2 scirra
洗澡的熱氣讓鏡子充滿霧而看不清自己的美貌、帥髮型啦,把它們擦一擦來一探究竟吧。
開發環境: Construct 2
繪圖軟體: illustrator
音效/背景樂: 小森平的免費音效、YouTube音效庫
(都做完了才想到說我家的浴室洗澡方式不太一樣,普遍好像並不會面對鏡子...)
趁現在還有動力,第一個就來超基礎班手把手教學(雖然糞到應該不會有人想學)
有能寫得更好的地方,也請不吝惜指教orz
沒接觸過想摸摸的人,官網就已經很用心囉,還是繁中!基本上看過就會一大半(?)
打個小目錄,這篇大致講到:
視窗/畫布大小、隨機生成、游標圖案、拖曳擦拭、圖層設置、動畫循環、動畫中心點、開始遊戲、重新開始遊戲
開始吧,先開個新的空專案
按右邊的專案資料夾就能更改視窗大小(資料夾能改名痾),改好會發現白色的地方還是多了很多出來

隨便按其他空的地方看到LayoutSize能更改畫布大小

其實沒什麼用,只是比較清爽(
 它叫squ
它叫squ
先準備好圖片,個人是用以拉弄,不知道的話怎麼做可以參考這篇
做好就直接拉進Layout中
按下Event sheet1就能開始(偽)程式的部分

原本是用時間生的,後來沒找到時間的重置,改用以下的方法
(順便說下小發現,大約每0.01秒就是極限,再更多0也沒什麼差異)
設定方塊上限數量
滑鼠右鍵選擇Add global variable

我的方塊檔名叫squ,方便辨識就取叫squNumber (=0)
空白處點兩下,選擇system,找到compare variable

squNumber設定小於和你要生的數量上限
隨機生成
add action ->system ->(General)create object
random讓它亂數,視窗是500的正方形,所以括號內都是500

右鍵紅點處(點齒輪和字都是別的功能痾)

squ->(Z order)Is on layer((在最下面
add action->system->add to->squNumber (1)

按左上角的播放鍵或debug播放鍵可以測試做的結果

圖案跟著游標
 它叫hand
把圖案先匯進去後
add event->system->(General)Every tick
add action->hand->(Size&Position)Set position->Mouse.X, Mouse.Y

現在就能跟著跑惹
拖曳擦拭
add event->mouse->mouse button is down->left
之前的紅點處右鍵,不過這次是another condition (兩個條件都符合才會啟動)

hand->(Collisions)Is overlapping another object->squ
add action->squ->(Misc)Destroy

可以把方塊擦掉囉~
不過如果上限打得比較高,會發生你追我跑、你在擦它在生的情況
生成完後才可擦拭
再增加一個全域變數(Global number)->stopCreate (=0)
回到生成那段,add another condition->system->comepare variable->stopCreate=0
add event ->system->comepare variable->squNumber大於等於上限數量
add action->system->set value->stopCreate=1
再到拖曳擦拭那段,add another condition->system->comepare variable->stopCreate=1

發現方塊會跑到手的上面

+鍵增加圖層,鉛筆改名
就能把前面的改一改拆散他們 (圖層要用名字就打雙引號)


準備兩張以上的圖,先把一張丟進去後,點它兩下
Animation frames的視窗右鍵->import frames->from files->選第二張圖匯入
Animations-> Default-> Loop->yes

動畫就能循環播放,loop上面的speed可以改播放速度,也能在每個影格上改
改變中心點
我有幾張固定在下面,越長越高的,中心點在底部才會正常
點準心->跑出Image points->右鍵Origin->Quick assign->Bottom
再右鍵一次Origin->Apply to all animations(套用到所有影格)

每個圖層用眼睛圖示開開關關就能找兇手,把它的圖層改成透明

 它叫word_start
匯好開始的圖檔,用內鍵的打字也行啦
新增Global Number->wordd (=0) (判斷按了開始沒)
add event->mouse->On click
add another condition->mouse->Cursor is over object-> word_start
add another condition->system->comepare variable->wordd=0
add action->word_start->Destroy
add action->system->set value->wordd=1
回到生成完擦拭那段,add another condition->system->comepare variable->wordd=1

重新開始
 它叫word_restart
身為重新開始,當然要等玩完才會出現,所以先設定成一開始不顯示

相信能看到這麼下面的人都很有慧根,直接看圖就懂的,功能基本都跟文字一樣

這樣超陽春版的基本流程就做好囉~超興奮的有沒有!(沒有)
剩下的會全整理在下一篇,不然這篇就太長啦(也想順便休息),明明那麼無聊的遊戲我也不知道為什麼這麼長(
下篇大概會講到:
控制游標動畫、隨機前景/背景/角色動畫、淡出、透明度、結束的閃亮效果、網址連結、音效/背景樂、輸出上傳網站
沒意外的話明天應該就出來了,恩,但是你知道的,人生總是充滿意外O:)
-
0128看來意外沒發生,已經整理好囉XD
Construct 2教學| 讓鏡子擦的更加juicy!

網址連結Link 網址連結2 scirra
洗澡的熱氣讓鏡子充滿霧而看不清自己的美貌、帥髮型啦,把它們擦一擦來一探究竟吧。
開發環境: Construct 2
繪圖軟體: illustrator
音效/背景樂: 小森平的免費音效、YouTube音效庫
(都做完了才想到說我家的浴室洗澡方式不太一樣,普遍好像並不會面對鏡子...)
趁現在還有動力,第一個就來超基礎班手把手教學(雖然糞到應該不會有人想學)
有能寫得更好的地方,也請不吝惜指教orz
沒接觸過想摸摸的人,官網就已經很用心囉,還是繁中!基本上看過就會一大半(?)
打個小目錄,這篇大致講到:
視窗/畫布大小、隨機生成、游標圖案、拖曳擦拭、圖層設置、動畫循環、動畫中心點、開始遊戲、重新開始遊戲
開始吧,先開個新的空專案
0.大小訂定
這個因為曾經找不到過,所以也講一下按右邊的專案資料夾就能更改視窗大小(資料夾能改名痾),改好會發現白色的地方還是多了很多出來
隨便按其他空的地方看到LayoutSize能更改畫布大小

其實沒什麼用,只是比較清爽(
1.霧氣方塊
 它叫squ
它叫squ先準備好圖片,個人是用以拉弄,不知道的話怎麼做可以參考這篇
做好就直接拉進Layout中
按下Event sheet1就能開始(偽)程式的部分
原本是用時間生的,後來沒找到時間的重置,改用以下的方法
(順便說下小發現,大約每0.01秒就是極限,再更多0也沒什麼差異)
設定方塊上限數量
滑鼠右鍵選擇Add global variable

我的方塊檔名叫squ,方便辨識就取叫squNumber (=0)
空白處點兩下,選擇system,找到compare variable

squNumber設定小於和你要生的數量上限
隨機生成
add action ->system ->(General)create object
random讓它亂數,視窗是500的正方形,所以括號內都是500
右鍵紅點處(點齒輪和字都是別的功能痾)
squ->(Z order)Is on layer((在最下面
add action->system->add to->squNumber (1)
按左上角的播放鍵或debug播放鍵可以測試做的結果
2.游標
在layout處點兩下加進mouse功能
圖案跟著游標
它叫hand把圖案先匯進去後
add event->system->(General)Every tick
add action->hand->(Size&Position)Set position->Mouse.X, Mouse.Y
現在就能跟著跑惹
拖曳擦拭
add event->mouse->mouse button is down->left
之前的紅點處右鍵,不過這次是another condition (兩個條件都符合才會啟動)
hand->(Collisions)Is overlapping another object->squ
add action->squ->(Misc)Destroy
可以把方塊擦掉囉~
不過如果上限打得比較高,會發生你追我跑、你在擦它在生的情況
生成完後才可擦拭
再增加一個全域變數(Global number)->stopCreate (=0)
回到生成那段,add another condition->system->comepare variable->stopCreate=0
add event ->system->comepare variable->squNumber大於等於上限數量
add action->system->set value->stopCreate=1
再到拖曳擦拭那段,add another condition->system->comepare variable->stopCreate=1
發現方塊會跑到手的上面
3.圖層設置
專案資料夾視窗下面會看到Layers
+鍵增加圖層,鉛筆改名
就能把前面的改一改拆散他們 (圖層要用名字就打雙引號)
4.角色
動畫播放準備兩張以上的圖,先把一張丟進去後,點它兩下
Animation frames的視窗右鍵->import frames->from files->選第二張圖匯入
Animations-> Default-> Loop->yes
動畫就能循環播放,loop上面的speed可以改播放速度,也能在每個影格上改
改變中心點
我有幾張固定在下面,越長越高的,中心點在底部才會正常
點準心->跑出Image points->右鍵Origin->Quick assign->Bottom
再右鍵一次Origin->Apply to all animations(套用到所有影格)
5.背景/前景
多開幾個圖層來放前背景,可能遇到一塊白白的擋住,恩它是一開始預設的畫布每個圖層用眼睛圖示開開關關就能找兇手,把它的圖層改成透明

6.開始結束畫面
按開始後才可擦拭(也要等它生成完)匯好開始的圖檔,用內鍵的打字也行啦
新增Global Number->wordd (=0) (判斷按了開始沒)
add event->mouse->On click
add another condition->mouse->Cursor is over object-> word_start
add another condition->system->comepare variable->wordd=0
add action->word_start->Destroy
add action->system->set value->wordd=1
回到生成完擦拭那段,add another condition->system->comepare variable->wordd=1
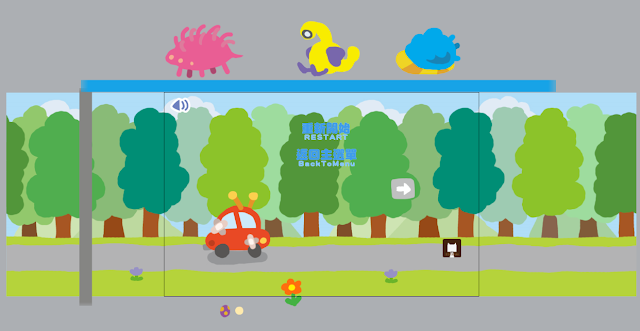
重新開始
身為重新開始,當然要等玩完才會出現,所以先設定成一開始不顯示

相信能看到這麼下面的人都很有慧根,直接看圖就懂的,功能基本都跟文字一樣
這樣超陽春版的基本流程就做好囉~超興奮的有沒有!(沒有)
剩下的會全整理在下一篇,不然這篇就太長啦(也想順便休息),明明那麼無聊的遊戲我也不知道為什麼這麼長(
下篇大概會講到:
控制游標動畫、隨機前景/背景/角色動畫、淡出、透明度、結束的閃亮效果、網址連結、音效/背景樂、輸出上傳網站
沒意外的話明天應該就出來了,恩,但是你知道的,人生總是充滿意外O:)
-
0128看來意外沒發生,已經整理好囉XD
Construct 2教學| 讓鏡子擦的更加juicy!